
If your kitchen feels outdated or uninspired, you don’t need a massive renovation budget to make it shine. With a few creative touches and some hands-on effort, you can transform your kitchen cabinets into the stunning centerpiece of your home.
Do it yourself kitchen cabinets projects have become one of the most rewarding and affordable ways to refresh your space—giving you both pride and a professional-quality finish without hiring a designer.
Let’s explore how you can bring a professional touch to your DIY cabinet makeover, from color choices and finishes to smart upgrades and styling secrets.
The Magic of a DIY Kitchen Transformation
There’s something special about working on your own kitchen. It’s not just about saving money; it’s about creating a space that feels personal. Every brushstroke, every piece of hardware, and every small adjustment you make adds character. A do it yourself kitchen cabinet project allows you to take full creative control, blending style and function on your terms.
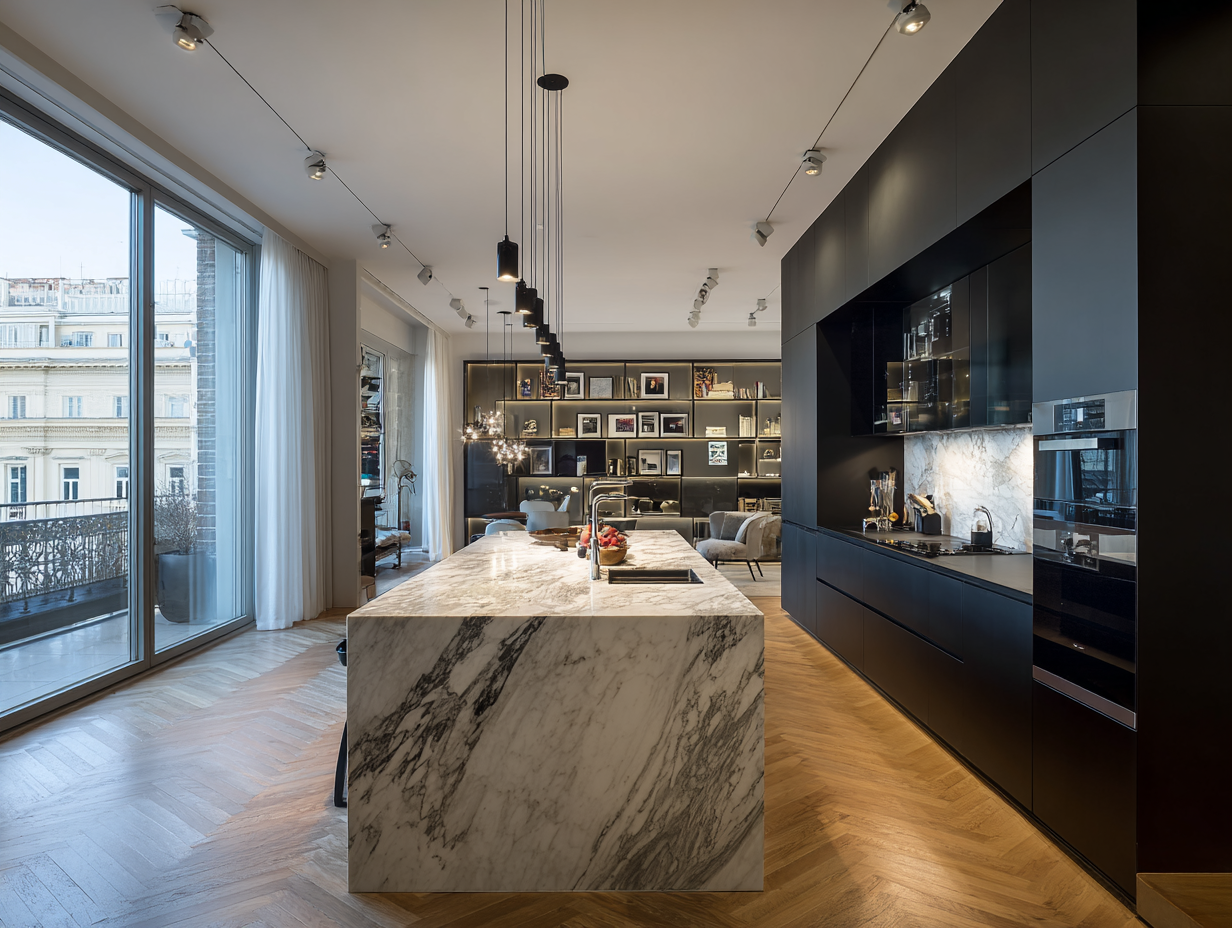
Most homeowners think professional-looking cabinets are out of reach, but the truth is—it’s all about the details. Clean lines, smooth finishes, coordinated colors, and modern hardware can turn ordinary cabinets into a custom-designed showpiece.
Step 1: Start with a Vision
Before you pick up a brush or screwdriver, visualize what kind of atmosphere you want. Do you want a modern minimalist kitchen with crisp whites and sleek metals? Or maybe you prefer a cozy farmhouse style with rustic textures and warm tones?
This initial planning phase helps you stay focused. Create a mood board or save inspiration photos online. Pay attention to:
- Cabinet colors that complement your countertops and flooring.
- Hardware finishes that suit your overall theme (brushed gold, matte black, chrome, etc.).
- The style of cabinet doors—flat, shaker, beadboard, or raised panel.
Once you see how everything fits together, you’ll have a clearer direction before you begin your do it yourself kitchen cabinet upgrade.
Step 2: The Power of Paint
One of the most dramatic and affordable ways to give your cabinets a professional look is with paint. It can completely change the personality of your kitchen. The key is proper preparation and the right color choice.
Preparation Makes All the Difference
Remove the cabinet doors and hardware, then clean the surfaces with a degreaser to remove oils and dirt. Lightly sand everything to help the paint adhere better, and don’t forget to wipe off the dust before painting.
Choose Your Paint Wisely
For a smooth, durable finish, use high-quality cabinet or trim paint. Satin and semi-gloss finishes are ideal because they’re easy to clean and reflect light beautifully.
Trending DIY Cabinet Colors
- Soft White: Clean, timeless, and makes the space look larger.
- Navy Blue: A bold, designer-approved color that pairs beautifully with gold hardware.
- Sage Green: Calming and earthy, perfect for a natural, cozy kitchen.
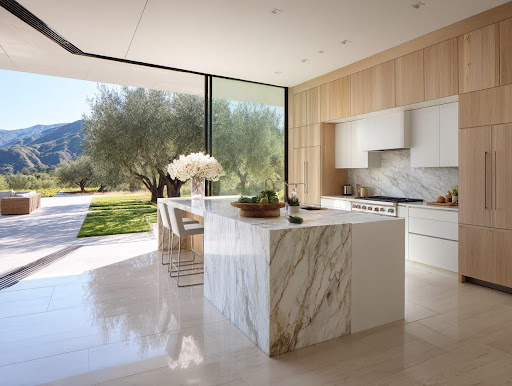
- Charcoal Gray: Modern and sophisticated, ideal for pairing with marble or quartz countertops.
- Warm Taupe: Adds depth and warmth without being too dark.
When done carefully, painted cabinets can rival even the most expensive designer kitchens.
Step 3: Update the Hardware for Instant Luxury
Cabinet hardware is like jewelry—it completes the look. Swapping out your old knobs and handles for something modern can instantly elevate your space.
Matte black handles give a sleek, contemporary feel, while brushed brass or gold adds warmth and elegance. If you’re going for a farmhouse style, consider oil-rubbed bronze or antique-style pulls.
Pro Tip: Make sure the new hardware matches your faucet and lighting fixtures for a cohesive finish. This small detail is often what makes a do it yourself kitchen cabinet makeover look truly professional.
Step 4: Add Molding and Trim for a Custom Look
If your cabinets are plain, adding simple trim or crown molding can make them look high-end. These decorative elements add depth and character, creating that built-in appearance seen in luxury kitchens.
- Crown molding: Adds height and elegance at the top of cabinets.
- Base molding: Creates a finished look at the bottom edge.
- Panel trim: Perfect for adding detail to flat cabinet doors.
You can find lightweight molding pieces at your local hardware store. With a bit of cutting, gluing, and painting, you can achieve a custom-cabinet feel without spending thousands.
Step 5: Replace or Refinish Cabinet Doors
If your cabinet boxes are in good shape but the doors look worn, consider replacing just the doors. This approach saves money while still giving your kitchen a fresh identity.
You can order unfinished doors online and paint or stain them yourself. Or, if you’re on a tighter budget, you can sand and refinish your existing doors with wood stain for a rich, natural finish.
Adding modern shaker-style doors is a popular choice among DIY enthusiasts because the clean lines look professional and timeless.
Step 6: Mix Open Shelving with Cabinets
Professionally designed kitchens often mix closed cabinets with open shelving to create visual balance. You can remove a few upper cabinet doors and replace them with floating shelves to achieve this look.
Use these shelves to display:
- White dishes or glassware for a clean look.
- Small plants for a touch of greenery.
- Cookbooks or decorative bowls for personality.
This combination of function and design makes your do it yourself kitchen cabinet project look intentional and curated.
Step 7: Upgrade Your Lighting
Lighting plays a huge role in how your cabinets look. Even the most beautifully painted cabinets can lose their impact under harsh or dim lighting. Consider adding:
- Under-cabinet lighting to brighten your countertops and create depth.
- Warm LED lights to enhance color tones and make your kitchen feel cozy.
- Statement pendants over an island to add a professional designer touch.
Lighting highlights the craftsmanship of your work and gives your kitchen that magazine-quality glow.
Step 8: Add Texture with Beadboard or Wallpaper
Adding texture is one of the easiest ways to make your cabinets stand out. Beadboard panels, peel-and-stick wallpaper, or even contact paper can bring depth and pattern to otherwise simple cabinets.
You can apply them inside cabinet doors, on the sides, or behind glass inserts. Choose neutral patterns like herringbone, linen, or subtle marble effects for a professional look. When done correctly, these details look intentional, stylish, and far from DIY.
Step 9: Consider Two-Tone Cabinets
Designers love the two-tone cabinet trend—and it’s easy to recreate at home. Painting your upper cabinets one color and your lower cabinets another creates a modern contrast.
For example:
- White uppers and navy lowers create balance and elegance.
- Cream uppers with deep forest green lowers bring warmth and sophistication.
- Light gray uppers with charcoal lowers look sleek and urban.
This approach makes your kitchen look like it was designed by a professional without extra cost.
Step 10: Focus on Finishing Touches
After your cabinets are painted and reassembled, the final touches make all the difference.
- Add soft-close hinges to make doors shut smoothly.
- Use felt bumpers to protect paint and reduce noise.
- Replace old hinges if they squeak or stick.
- Apply a clear protective coat for durability if your kitchen gets heavy use.
These small details show craftsmanship and elevate your do it yourself kitchen cabinet project from “homemade” to “high-end.”
Step 11: Organize Like a Pro
Professional kitchens don’t just look good—they function beautifully. To make your DIY cabinet project feel polished, focus on organization. Add:
- Pull-out drawers for pots and pans.
- Dividers for utensils and baking sheets.
- Lazy Susans for corner cabinets.
- Labeled jars and baskets for pantry storage.
These functional upgrades keep your space clean, efficient, and visually appealing every day.
Step 12: Style Your Space Thoughtfully
Once your cabinets are complete, take a step back and style the surrounding space like a designer would. Consider the color of your backsplash, countertop decor, and even your small appliances.
Keep your countertop minimal—just a few styled items like a cutting board, a vase with fresh herbs, or a ceramic bowl of fruit. The goal is to let your beautiful new cabinets stand out as the star of your kitchen.
Step 13: Maintain Your DIY Masterpiece
After putting in the effort, you’ll want to protect your hard work. Use gentle cleaners (no harsh chemicals) and wipe up spills immediately to preserve your finish. A little regular maintenance will keep your cabinets looking fresh and professional for years.
Bringing It All Together
A do it yourself kitchen cabinet project doesn’t have to feel intimidating. With the right plan, some patience, and attention to detail, you can achieve a look that rivals professional designs. The secret lies in preparation, color coordination, high-quality finishes, and thoughtful styling.
Your kitchen isn’t just a place to cook—it’s where life happens. By infusing it with your personal touch, you create not just a beautiful space but a reflection of your creativity and dedication. Each time you walk into your kitchen and see those freshly painted cabinets, sleek handles, and glowing finishes, you’ll be reminded that you didn’t just design a kitchen—you built something uniquely yours.
So grab that paintbrush, pick your palette, and start transforming your kitchen one cabinet at a time. With care, confidence, and a little creativity, your do it yourself kitchen cabinets project can look like it came straight out of a professional design magazine—and it all starts with you.